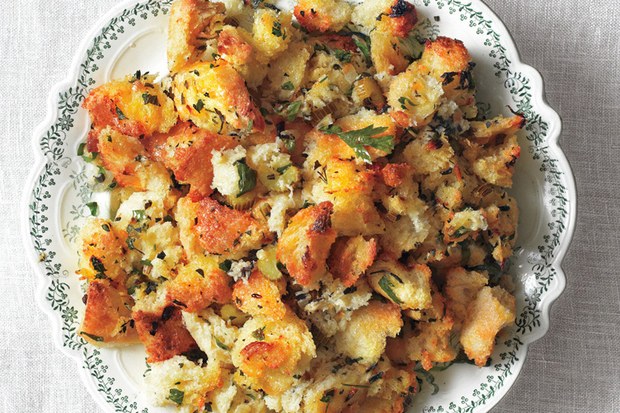
What's Thanksgiving without America's #1 favorite side dish? Next to the turkey, no Thanksgiving is complete without the best stuffing, and you can find the perfect recipe here: INGREDIENTS 3/4 cup (1 1/2 sticks) unsalted butter plus more for baking dish 1 pound good-quality day-old white bread, torn into 1" pieces (about 10 cups) 2 1/2 cups chopped yellow onions 1 1/2 cups 1/4" slices celery 1/2 cup chopped flat-leaf parsley 2 tablespoons chopped fresh sage 1 tablespoon chopped fresh rosemary 1 tablespoon chopped fresh thyme 2 teaspoons kosher salt 1 teaspoon freshly ground black pepper 2 1/2 cups low-sodium chicken broth, divided 2 large eggs PREPARATION Preheat oven to 250ºF. Butter a 13x9x2" baking dish and set aside. Scatter bread in a single layer on a rimmed baking sheet. Bake, stirring occasionally, until dried out, about 1 hour. Let cool; transfer to a very large bowl. Meanwhile, melt 3/4 cup butter in a large skillet over medium-high heat; add onions and celery. Stir often until just beginning to brown, about 10 minutes. Add to bowl with bread; stir in herbs, salt, and pepper. Drizzle in 1 1/4 cups broth and toss gently. Let cool. Preheat oven to 350ºF. Whisk 1 1/4 cups broth and eggs in a small bowl. Add to bread mixture; fold gently until thoroughly combined. Transfer to prepared dish, cover with foil, and bake until an instant-read thermometer inserted into the center of dressing registers 160ºF, about 40 minutes. DO AHEAD: Dressing can be made 1 day ahead. Uncover; let cool. Cover; chill. Bake dressing, uncovered, until set and top is browned and crisp, 40-45 minutes longer (if chilled, add 10-15 minutes). YIELD: Makes 8 to 10 servings
[caption id="attachment_71" align="alignnone" width="300"] Planning a move in the near future (hopefully here!)? Where do you start? Read our guide below for some tips on ensuring a smart and relatively stress free move when your deadline has come down to the wire. 1. Get Started When planning your move on short notice, you'll want to begin by properly assessing everything that may be required for the weeks (or even months) ahead. Confirm the fundamental info of your move before delving into the more complicated steps that require making paid reservations and the like, knowing an exact move-in date, etc. will help lay a fundamental groundwork that will allow the process to go much smoother overall. 2. Begin Pre-Packing You don't need to wait for every bit of paperwork to be filled out before beginning to pack, in fact, preliminary packing of less commonly-used rooms can prove to be an outright requirement. A good rule of thumb is to start packing at least a few boxes per day once you're sure you'll be moving in the near future. And start getting your place cleaned up if you are able to, this will save you cleaning time later. 3. Make Reservations This one is no joke, moving during the summer means dealing with the busiest and most booked-solid mover schedules of the year. Arguably the most important factor in avoiding major issues will be to contact your movers of choice the moment your move in date is confirmed. Otherwise, there's an unfortunate and potentially disastrous chance that you may find yourself without any movers available in time, definitely the furthest thing from a fun situation to have to deal with. 4. Set Your Own Deadlines Managing an arduous task like moving on short notice means you'll need to pay special consideration to the importance of deadlines, in this case, managing your own self-discipline and ensuring things get done in time will be extremely important. Set your own personal deadlines for when moving milestones should be completed, and before you know it you'll have formed a realistic (and informed) moving timeline that gives you a clearer understanding of what to expect. 5. Recruit Help from Friends As challenging as moving tends to be, you can expect to take those challenges and multiply them tenfold if you're facing them on your own. Recruiting the help of even just one or two friends can go an extremely long way in making the process much faster and much less of an overall burden, a committed team of friends can even sometimes knock out an apartment move in as little as one afternoon. Just be sure to reward them with pizza afterwards! 6. Compare Rates A major factor in ensuring a smooth move without much time to spare will be to lock down an affordable overall rate as early as possible, you won't want to scramble for a moving package at the last minute, only to find that the one you had in mind will run you considerably more than you wanted to pay. Price can (and should) serve as a large deciding factor in your choice of movers and services, so there's certainly nothing wrong with shopping around based primarily on price! Knowing how much you'll be able to spend will most likely prove to be one of the earliest things you'll need to get done before you proceed. 7. Label Boxes Smartly One of the simpler ways to keep your moving process running smoothly can be to come up with a simple method for labeling your personal possessions, a few rolls of colored painter's tape or something similar will usually be all you need. Before moving in, coordinate the layout of your destination by deciding on a color (or similar labeling distinction) for each room or major area across your new home. Then, label your boxes and containers appropriately so that the contents intended for each room match their corresponding color. This will allow you to quickly unload the contents of each room without having to give it too much thought. If your move is extremely short term and you don't have colored labeling materials on hand, you might consider something as simple as labeling boxes by number or letter.
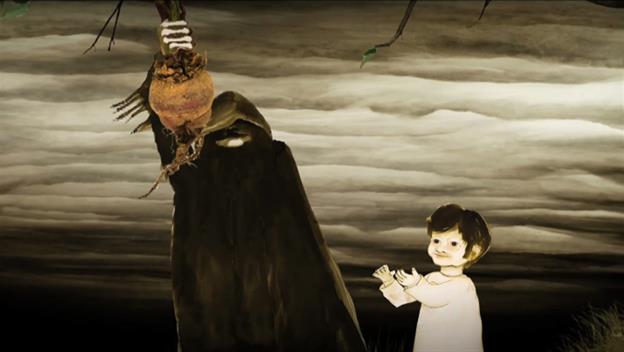
Straddling the line between fall and winter, plenty and paucity, life and death, Halloween is a time of celebration and superstition. It is thought to have originated with the ancient Celtic festival of Samhain, when people would light bonfires and wear costumes to ward off roaming ghosts. In the eighth century, Pope Gregory III designated November 1 as a time to honor all saints and martyrs; the holiday, All Saints' Day, incorporated some of the traditions of Samhain. The evening before was known as All Hallows' Eve and later Halloween. Over time, Halloween evolved into a secular, community-based event characterized by child-friendly activities such as trick-or-treating. In a number of countries around the world, as the days grow shorter and the nights get colder, people continue to usher in the winter season with gatherings, costumes and sweet treats. ANCIENT ORIGINS OF HALLOWEEN Halloween's origins date back to the ancient Celtic festival of Samhain (pronounced sow-in). The Celts, who lived 2,000 years ago in the area that is now Ireland, the United Kingdom and northern France, celebrated their new year on November 1. This day marked the end of summer and the harvest and the beginning of the dark, cold winter, a time of year that was often associated with human death. Celts believed that on the night before the new year, the boundary between the worlds of the living and the dead became blurred. On the night of October 31 they celebrated Samhain, when it was believed that the ghosts of the dead returned to earth. In addition to causing trouble and damaging crops, Celts thought that the presence of the otherworldly spirits made it easier for the Druids, or Celtic priests, to make predictions about the future. For a people entirely dependent on the volatile natural world, these prophecies were an important source of comfort and direction during the long, dark winter. To commemorate the event, Druids built huge sacred bonfires, where the people gathered to burn crops and animals as sacrifices to the Celtic deities. During the celebration, the Celts wore costumes, typically consisting of animal heads and skins, and attempted to tell each other's fortunes. When the celebration was over, they re-lit their hearth fires, which they had extinguished earlier that evening, from the sacred bonfire to help protect them during the coming winter. By 43 A.D., the Roman Empire had conquered the majority of Celtic territory. In the course of the four hundred years that they ruled the Celtic lands, two festivals of Roman origin were combined with the traditional Celtic celebration of Samhain. The first was Feralia, a day in late October when the Romans traditionally commemorated the passing of the dead. The second was a day to honor Pomona, the Roman goddess of fruit and trees. The symbol of Pomona is the apple and the incorporation of this celebration into Samhain probably explains the tradition of "bobbing" for apples that is practiced today on Halloween. On May 13, 609 A.D., Pope Boniface IV dedicated the Pantheon in Rome in honor of all Christian martyrs, and the Catholic feast of All Martyrs Day was established in the Western church. Pope Gregory III (731-741) later expanded the festival to include all saints as well as all martyrs, and moved the observance from May 13 to November 1. By the 9th century the influence of Christianity had spread into Celtic lands, where it gradually blended with and supplanted the older Celtic rites. In 1000 A.D., the church would make November 2 All Souls' Day, a day to honor the dead. It is widely believed today that the church was attempting to replace the Celtic festival of the dead with a related, but church-sanctioned holiday. All Souls Day was celebrated similarly to Samhain, with big bonfires, parades, and dressing up in costumes as saints, angels and devils. The All Saints Day celebration was also called All-hallows or All-hallowmas (from Middle English Alholowmesse meaning All Saints' Day) and the night before it, the traditional night of Samhain in the Celtic religion, began to be called All-hallows Eve and, eventually, Halloween. HALLOWEEN COMES TO AMERICA Celebration of Halloween was extremely limited in colonial New England because of the rigid Protestant belief systems there. Halloween was much more common in Maryland and the southern colonies. As the beliefs and customs of different European ethnic groups as well as the American Indians meshed, a distinctly American version of Halloween began to emerge. The first celebrations included "play parties," public events held to celebrate the harvest, where neighbors would share stories of the dead, tell each other's fortunes, dance and sing. Colonial Halloween festivities also featured the telling of ghost stories and mischief-making of all kinds. By the middle of the nineteenth century, annual autumn festivities were common, but Halloween was not yet celebrated everywhere in the country. In the second half of the nineteenth century, America was flooded with new immigrants. These new immigrants, especially the millions of Irish fleeing Ireland's potato famine of 1846, helped to popularize the celebration of Halloween nationally. Taking from Irish and English traditions, Americans began to dress up in costumes and go house to house asking for food or money, a practice that eventually became today's "trick-or-treat" tradition. Young women believed that on Halloween they could divine the name or appearance of their future husband by doing tricks with yarn, apple parings or mirrors. In the late 1800s, there was a move in America to mold Halloween into a holiday more about community and neighborly get-togethers than about ghosts, pranks and witchcraft. At the turn of the century, Halloween parties for both children and adults became the most common way to celebrate the day. Parties focused on games, foods of the season and festive costumes. Parents were encouraged by newspapers and community leaders to take anything "frightening" or "grotesque" out of Halloween celebrations. Because of these efforts, Halloween lost most of its superstitious and religious overtones by the beginning of the twentieth century. By the 1920s and 1930s, Halloween had become a secular, but community-centered holiday, with parades and town-wide parties as the featured entertainment. Despite the best efforts of many schools and communities, vandalism began to plague Halloween celebrations in many communities during this time. By the 1950s, town leaders had successfully limited vandalism and Halloween had evolved into a holiday directed mainly at the young. Due to the high numbers of young children during the fifties baby boom, parties moved from town civic centers into the classroom or home, where they could be more easily accommodated. Between 1920 and 1950, the centuries-old practice of trick-or-treating was also revived. Trick-or-treating was a relatively inexpensive way for an entire community to share the Halloween celebration. In theory, families could also prevent tricks being played on them by providing the neighborhood children with small treats. A new American tradition was born, and it has continued to grow. Today, Americans spend an estimated $6 billion annually on Halloween, making it the country's second largest commercial holiday. TODAY'S HALLOWEEN TRADITIONS The American Halloween tradition of "trick-or-treating" probably dates back to the early All Souls' Day parades in England. During the festivities, poor citizens would beg for food and families would give them pastries called "soul cakes" in return for their promise to pray for the family's dead relatives. The distribution of soul cakes was encouraged by the church as a way to replace the ancient practice of leaving food and wine for roaming spirits. The practice, which was referred to as "going a-souling" was eventually taken up by children who would visit the houses in their neighborhood and be given ale, food, and money. The tradition of dressing in costume for Halloween has both European and Celtic roots. Hundreds of years ago, winter was an uncertain and frightening time. Food supplies often ran low and, for the many people afraid of the dark, the short days of winter were full of constant worry. On Halloween, when it was believed that ghosts came back to the earthly world, people thought that they would encounter ghosts if they left their homes. To avoid being recognized by these ghosts, people would wear masks when they left their homes after dark so that the ghosts would mistake them for fellow spirits. On Halloween, to keep ghosts away from their houses, people would place bowls of food outside their homes to appease the ghosts and prevent them from attempting to enter. HALLOWEEN SUPERSTITIONS Halloween has always been a holiday filled with mystery, magic and superstition. It began as a Celtic end-of-summer festival during which people felt especially close to deceased relatives and friends. For these friendly spirits, they set places at the dinner table, left treats on doorsteps and along the side of the road and lit candles to help loved ones find their way back to the spirit world. Today's Halloween ghosts are often depicted as more fearsome and malevolent, and our customs and superstitions are scarier too. We avoid crossing paths with black cats, afraid that they might bring us bad luck. This idea has its roots in the Middle Ages, when many people believed that witches avoided detection by turning themselves into cats. We try not to walk under ladders for the same reason. This superstition may have come from the ancient Egyptians, who believed that triangles were sacred; it also may have something to do with the fact that walking under a leaning ladder tends to be fairly unsafe. And around Halloween, especially, we try to avoid breaking mirrors, stepping on cracks in the road or spilling salt. But what about the Halloween traditions and beliefs that today's trick-or-treaters have forgotten all about? Many of these obsolete rituals focused on the future instead of the past and the living instead of the dead. In particular, many had to do with helping young women identify their future husbands and reassuring them that they would someday, with luck, by next Halloween, be married. In 18th-century Ireland, a matchmaking cook might bury a ring in her mashed potatoes on Halloween night, hoping to bring true love to the diner who found it. In Scotland, fortune-tellers recommended that an eligible young woman name a hazelnut for each of her suitors and then toss the nuts into the fireplace. The nut that burned to ashes rather than popping or exploding, the story went, represented the girl's future husband. (In some versions of this legend, confusingly, the opposite was true: The nut that burned away symbolized a love that would not last.) Another tale had it that if a young woman ate a sugary concoction made out of walnuts, hazelnuts and nutmeg before bed on Halloween night she would dream about her future husband. Young women tossed apple-peels over their shoulders, hoping that the peels would fall on the floor in the shape of their future husbands' initials; tried to learn about their futures by peering at egg yolks floating in a bowl of water; and stood in front of mirrors in darkened rooms, holding candles and looking over their shoulders for their husbands' faces. Other rituals were more competitive. At some Halloween parties, the first guest to find a burr on a chestnut-hunt would be the first to marry; at others, the first successful apple-bobber would be the first down the aisle. Of course, whether we're asking for romantic advice or trying to avoid seven years of bad luck, each one of these Halloween superstitions relies on the good will of the very same "spirits" whose presence the early Celts felt so keenly.
Are you using too much detergent? Overloading the washer? Overdoing the bleach? Find out the answers to these questions and more, and pick up some smart laundry tips in the bargain. Mistake 1: Rubbing Stains Furiously This can make the stain worse and possibly wear away the fabric. Instead, be gentle and methodical. Treat the stain as soon as you can; the less time that elapses, the more success you'll have. And always use a white cloth so that colors can't transfer. Dab, rather than rub, working from the outside in to keep the stain contained. Mistake 2: Using Too Much Detergent Excess suds can hold dirt pulled from clothes and get caught in areas that won't always rinse clean, like under a collar, leading to bacteria buildup. The remedy: Use only half the amount of detergent that you normally do, then gradually increase that amount if your clothes are not coming out as clean as you would like. An exception: If you have hard water, you may actually need more soap than you are using. Check the recommendation for hard water on your detergent bottle. Mistake 3: Filling the Washing Machine Incorrectly When washing in a top-loader with liquid detergent, you should first fill with water, then add soap, then add clothes, right? Well, no. This protocol from the past was meant to prevent residue on the fabric and the machine. But modern detergents are phosphate-free and not harmful to clothes the way old formulas were. As long as you're not using bleach, don't add clothing after the water (a pain, because clothes can float). Instead, use this order to distribute detergent best: clothes, then water, then soap. Mistake 4: Washing an Item That Has a "Dry-Clean" Label This isn't necessarily a blunder. Most items that say "dry-clean" can be hand washed and air-dried. This includes natural fibers, such as linen and most silks. First check for colorfastness; moisten a cotton swab with mild detergent and dab it on a hidden seam to see if any dye comes off. If not, go ahead and dunk the garment in soapy water just once or twice, then rinse and immediately roll it in a towel to extract moisture. However, you should stick with dry-cleaning for certain categories: leather, suede, silk dupioni, anything with embellishments, and structured pieces (like blazers). Mistake 5: Not Zipping Zippers All the Way to the Top Metal teeth can snag delicate and woven clothing that's being washed in the same load. Mistake 6: Overusing Bleach Think twice before you reach for the bleach: You actually don't need it to get rid of protein stains, like blood, sweat, and tears. (Okay, maybe tears are not a big laundry issue.) One natural option: Toss stained socks, tees, and undies into a big pot of water with a few lemon slices and bring to a boil for a few minutes. Mistake 7: Not Leveling Your Washing Machine IIf your washer is not level, vibrations can damage your floor and prematurely wear out key components, like the shock absorbers and the tub bearings. (Plus, there's that terrible noise.) Place a level on top of the machine and adjust the feet, which typically screw up and down, accordingly. If this doesn't help, beef up the floor with a 1/4-inch-thick piece of plywood that's a little larger than the machine's base. It will help absorb vibrations. Mistake 8: Letting the Dryer "Rest" Between Loads Some folks like to wait an hour after one cycle concludes before putting in a new load. But in fact, running back-to-back dryer loads is smart and efficient. It lets you take advantage of retained heat from the previous cycle, cutting down on energy usage. Mistake 9: Ignoring the Permanent Press Setting on Your Dryer This medium-heat cycle with a cool-down period at the end is a proven crease curber. More tips: Don't pack clothes in; they need to float freely or they'll wrinkle. (Note: Ditto for the washer. Stuffing it can create wrinkles and prevent your clothes from getting clean. On top of that, it can put pressure on the machine's bearings and shock absorbers, causing them to wear down prematurely.) And procrastinators, take note: It really does eliminate creases if you fold clothes when they're still hot, right out of the dryer (or, if you prefer, right out of the pile that you dumped onto your bed). Give each item a quick shake so wrinkles don't set in. If you don't have time to fold a load immediately, shake out the pieces and lay them flat in the laundry basket, one on top of another, while they await further attention. Mistake 10: Tossing Socks in Willy-Nilly Here's a sock-saving tip: Place socks in the washer tub first, so they're less likely to attach themselves to other garments and then go missing. Mistake 11: Not Cleaning Your Dryer Even though you empty the lint filter after each use (right?), lint buildup can clog the duct over time and become a fire hazard. A sure sign that your dryer is clogged? It takes more than an hour to dry a load. Once a year, detach the hose from the back of the dryer and snake a long brush through to push out lint (20-foot dryer vent brush, $35, gbindustrialdirect.com). Also scrub the lint filter once a year with a small toothbrush and a bit of detergent. Rinse, then air-dry completely. Twin Ridge
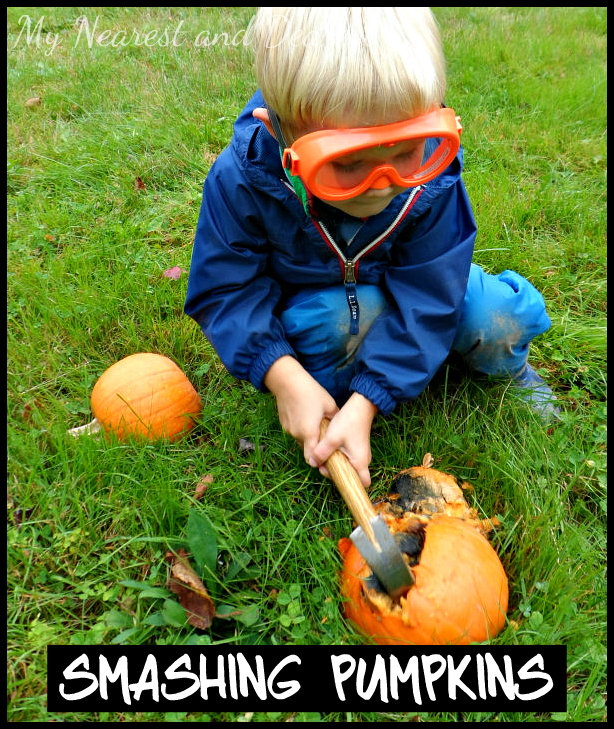
Tis the season--pumpkin season that is! And what better way to celebrate Fall with these fun pumpkins activities! Check out the links below to find creative, fun, and stimulating activities that involve everyone's favorite gourd! 1. No holiday is complete without a themed sensory bin ! Dye some water orange and toss in all the pumpkin things you can find like, ceramic pumpkins, foam pumpkins and orange pom poms. 2. Paint pumpkins with toilet paper roll painting . Just dip an empty roll in orange paint and stamp it on paper. Use a crayon to color in a stem. 3. Make a paper plate pumpkin that is cute artwork and also doubles as a name recognition activity. This pumpkin activity is also great for fine motor skills. 4. Dress your Halloween candy or goodies in pumpkin perfect wrapping . A little tissue paper, an empty TP roll and a green pipe cleaner is all you need. 5. Make a Halloween garland with pumpkin salt-dough . Create your ornaments and after they dry you can paint them and hang them in your home. 6. Make a felt pumpkin with extra face pieces and have your kids create the pumpkin face that matches each card. This has a free printable to go along with it! 7. Make a construction paper pumpkin and decorate it with googley eyes and markers. A fun way to change it up is to cut an egg carton and use the bottom as eyes. 8. Sometimes it's fun just to explore and get messy. Try heading outside with a pumpkin and a hammer (and adult supervision) and smash it!
Yes, you read that right! You can exercise in your apartment, dorm room or any small space! While a lot of us may have gym memberships, sometimes it's not in the budget, and sometimes we prefer to do what we can in the privacy of our own home. I thought I would share some simple apartment exercises with equipment that can easily be stored in a closet. Ready or not, here we go! ONE: An old standby that is great for toning up is the resistance tube. To target thighs and upper arms, try this squat. With feet shoulder-width apart, stand on the tube and hold its handles. Lower your body, making sure your knees don't extend past your toes. Push down on your heels and curl your arms toward your chest as you straighten your legs. Start with 15 repetitions. Note: Not all resistance tubes are the same. They vary by level of resistance (light, medium and heavy). For a newbie, start with the light, and as the exercises get easier for you, move up to a medium and/or large. TWO: Using a full-body exercise ball (a lightweight, plastic ball), you can easily do the ball squat. Begin standing with your feet hip-width apart. As if you are sitting down into a chair, bend your knees until they come to a 90-degree angle. Return to the standing position. Here are 15 additional full-body exercise ball workouts to consider as well. The full-body exercise ball can also serve as a seat for your desk, making storage even simpler! THREE: Not getting the upper-body results you're looking for? Give the kettlebell a try. This front raise targets your shoulders and back. Start in a standing position with your feet hip-width apart and knees slightly bent; hold the kettlebell with two hands, resting your arms on your thighs. Lower yourself as if sitting in a chair, making sure your knees don't extend past your toes. Lift your back up by straightening your legs and simultaneously raising the kettlebell to shoulder height. Return to the starting position. Do this 15 times. Check out these kettlebell exercises for weight loss too! Please note that you should always start with lighter weights and gradually increase to heavier weights. FOUR: Jog'n Shape boards. Are you familiar with these pieces of equipment? I was introduced to these years ago when doing Curves. I've had one for years now and love it! It's constructed of strong, lightweight polymer. I have bad knees, and this was created for those who might have bad knees, hips and ankles; however, it can be used by anyone. These boards are supported by energy blocks, providing shock absorption. You can jog, walk, jump or dance! This is a great alternative for small spaces too! FIVE: The dumbbell row provides a great workout for your back. Dumbbells come in many different weights, so be sure to start with a comfortable weight. Begin by standing with your feet hip-width apart, holding a hand weight in each hand. Bend your knees to a 45-degree angle and lower your upper body toward the ground until your chest is angled toward the floor. Straighten your arms down with you palms facing in. Bend your elbows, keeping your arms close to your sides until the weights touch your sides. Return to the starting position.